
This delicious homemade soursop ice cream is rich, refreshing, and incredibly easy to make. If you love tropical fruits, this homemade treat is about to become one of your favorites.
I get all my tropical fruits online from Miami Fruit. I not only love supporting a small business, but I also love that they have high-quality tropical fruit sourced from local family farms in South Florida. If you like to try them out, then use my code ALLNATURAL5 for 5% off!

As an Amazon Associate, I earn from qualifying purchases.
This recipe features several affiliate links, meaning I will earn a small commission if you purchase through these links.
Ingredients To Make Fresh Soursop Ice Cream:
You only need a handful of simple ingredients to make this creamy homemade soursop ice cream. Let's have a look.

- Soursop Pulp (Fresh Soursop Fruit): The star of this recipe. The soft, fragrant soursop pulp creates the signature creamy texture and tropical flavor found in traditional guanabana ice cream and even in Trini cooking. Buy enough to also try out my Soursop Coconut Cream Pie or Passion Fruit Mousse. And don't forget to use my code ALLNATURAL5 for 5% off when you buy tropical fresh fruit from Miami Fruit!
- Coconut Cream: It adds richness and a smooth, dairy-free base. It replaces traditional options like whole milk, a cup of heavy cream, or condensed milk.
- Maple Syrup: It naturally sweetens the ice cream without needing a cooked sugar mixture or a cup of sugar.
- Vanilla Bean Powder or Vanilla Extract: It enhances the tropical flavor with a warm, subtle sweetness.
- Sea Salt: Just a pinch balances the sweetness and deepens the flavor.
See the recipe card for quantities.
How To Make It:
Let me show you how easy it is to make this ice cream at home! You can make it with or without an ice cream maker.
Ice Cream Maker Method:
- Prep the Soursop: Slice the fruit open, discard the seeds, and scoop out roughly 2 cups of the soft flesh.
- Make the Base: Add the soursop pulp, coconut cream, maple syrup, vanilla, and sea salt to a blender. Blend until silky smooth and fully combined.
- Churn: Pour the mixture into your ice cream maker and churn according to your machine's directions until it reaches a thick, creamy consistency.
- Freeze: Transfer to a freezer-safe container and let it set for a couple of hours until firm.
- Serve: Scoop and enjoy your smooth, tropical homemade treat.
No Ice Cream Machine Method:
- Prep the Soursop & Blend all Ingredients: Follow the same steps as above, but skip the churn.
- Freeze: Pour the mixture into a shallow, freezer-safe dish.
- Stir for Creaminess: After 1 hour, remove from the freezer and stir well with a fork or whisk. Continue mixing every 30-45 minutes for a few hours, until the mixture thickens and becomes creamy.
- Final Freeze: Let it freeze a bit longer until firm enough to scoop, then serve.
Top Tips:
Here are a few tips to make this fresh soursop ice cream turn out perfectly every time.
- Use Ripe Soursop: The softer and more fragrant the fruit, the better the flavor and texture. I am never disappointed when buying tropical fruit from Miami Fruit (use code ALLNATURAL5 for 5% off).
- Blend Until Completely Smooth: This ensures a creamy consistency without fibrous bits.
- Don't Skip the Salt: A small pinch enhances the natural sweetness.
- Chill Before Serving: Letting it firm up improves scoopability.
Variations And Substitutions:
- Make It Extra Creamy: Add a bit more coconut cream, or use full-fat coconut cream, for a richer texture, similar to my Golden Milk Ice Cream.
- Sweetener Options: Swap maple syrup with brown sugar or coconut sugar for a deeper flavor.
- Citrus Twist: Add a little lime juice to enhance the tropical notes.

Storage:
- Freezer: Store in an airtight container for up to 2 weeks.
- Best Texture: Let it sit at room temperature for 5-10 minutes before scooping.
Equipment Needed:
- Blender: For blending the ice cream base until smooth.
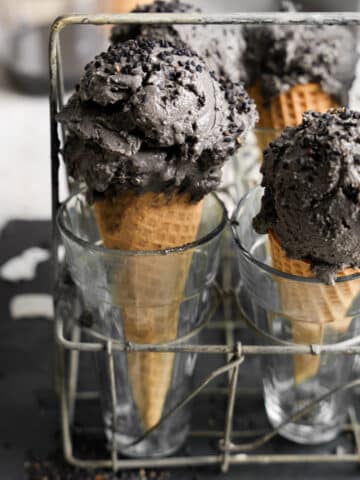
- Ice Cream Maker: For churning (optional but recommended for best texture). I highly recommend an ice cream maker. It's so easy to use, a small investment, and lets you make the best vegan homemade ice cream with flavors you actually enjoy, like my Black Sesame Ice Cream or Pink Dragon Fruit Ice Cream, to name a few.
- Large Mixing Bowl: Helpful if prepping ingredients ahead.
- Freezer-Safe Container: For storing your ice cream.
FAQ
It has a creamy, tropical flavor that's often described as a mix between pineapple, strawberry, and citrus. Make sure to check out my Weird Fruit Wednesday episode on it!
Yes, but this version is dairy-free and naturally sweetened.
Absolutely, just thaw slightly before blending.
More Amazing Vegan Homemade Ice Cream Recipes To Try Next:
Make sure to check out some of my other delicious homemade vegan ice cream recipes or head to my 30+ Best Vegan Ice Cream Recipes Roundup for the ultimate vegan ice cream inspiration!

Soursop Ice Cream
Equipment
- 1 ice cream container
Ingredients
- 1 soursop about 2 cups flesh Miami Fruit
- ⅔ cup coconut cream
- 1 teaspoon vanilla bean powder
- ⅓ cup maple syrup
- ¼ teaspoon sea salt
Instructions
Instructions (Ice Cream Maker Method)
Prepare the soursop:
- Cut the soursop in half and remove the seeds. Scoop out the flesh until you have about 2 cups.
Blend the base:
- Add the soursop flesh, coconut cream, vanilla bean powder, maple syrup, and sea salt to a blender. Blend until completely smooth and creamy.
Churn the ice cream:
- Pour the blended mixture into your ice cream maker and churn according to the manufacturer's instructions, usually about 30-35 minutes, until thick and creamy.
Freeze to firm:
- Transfer the ice cream to a freezer-safe container and freeze for 2-3 hours to firm up.
Serve:
- Scoop and enjoy your creamy tropical soursop ice cream.
Instructions (No Ice Cream Machine)
Prepare the soursop:
- Remove the seeds and scoop out about 2 cups of soursop flesh.
Blend the mixture:
- Add the soursop, coconut cream, vanilla bean powder, maple syrup, and sea salt to a blender. Blend until completely smooth.
Freeze the mixture:
- Pour the mixture into a shallow freezer-safe container.
- Stir to prevent ice crystals:
- Freeze for 1 hour, then remove from the freezer and stir well with a fork or whisk. Repeat this process every 30-45 minutes for about 3 hours to create a creamy texture.
Final freeze:
- Once thick and scoopable, let it freeze for another 1-2 hours if needed before serving.


Comments
No Comments